
Underpainting to finished piece...
- Mar 3, 2018
- 1 min read

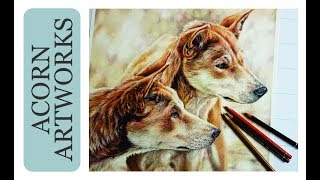
I thought I would share this comparison of the underpainting and finished painting. To start, I painted my background over the entire canvas. This is what I love about acrylics... you can paint over the top, so no need to mask anything off. Next I drew the basic outlines and eye positions after allowing the background to dry overnight at least. Next I did the underpainting. This process took only about 30 minutes because it's basically just blotching in your approximate colours in the right spots to give you an idea of contrast, colour, and placement. After allowing that to dry, I started with the fine detail. This took a lot longer (probably about 10 hours for this piece start to finish). I started at the nose. Being right handed, I like to start at the far left so my hand and arm doesn't smudge wet paint. Painting fur with acrylics is a very similar process to how we do it with coloured pencil. Having done the basic colours in the underpainting helped speed this process up heaps as I could leave a lot of those colours showing through. So essentially, you are not painting every single hair. Top photo is the finished Painting, bottom photo is the underpainting... I hope this is helpful.


Comments